
QR print size: calculate the modules, keep the margin
Understand physical width, resolution and the four-module quiet zone before sending artwork to print.
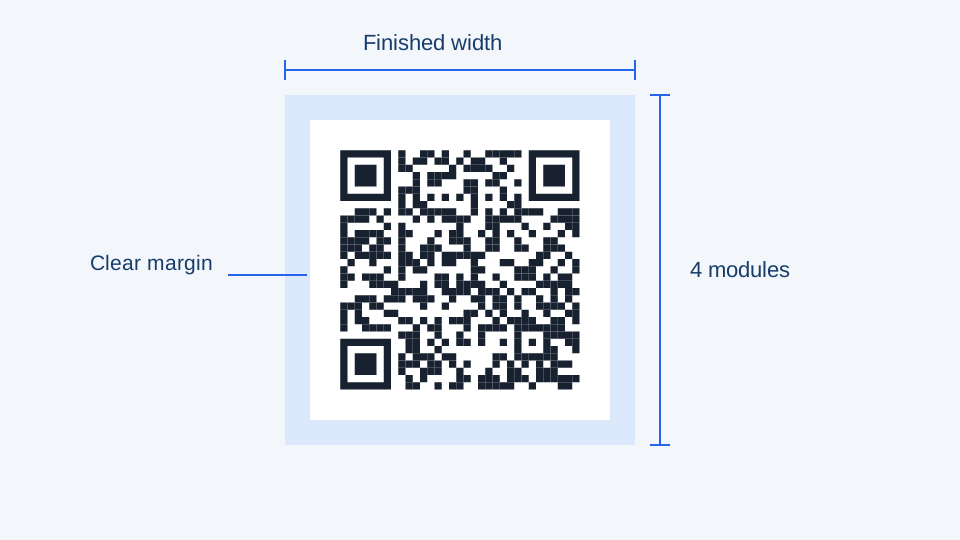
“Use a 2 cm QR code” is an incomplete instruction. It leaves out the amount of encoded content, the empty margin and the output resolution. A short URL and a long contact record may need different amounts of space even when both are QR codes.
Count the details that must survive printing
A standard QR symbol is made from small square modules. The encoded content and error correction determine the matrix size. Add an empty border of four modules on each side. If the symbol is 29 modules wide, its full tile is 37 modules wide after adding those margins.
At a chosen module width of 0.4 mm, that example tile is 14.8 mm across. This calculation describes geometry; it does not promise successful scanning at that size. DENSO WAVE’s code-area guide explains the module-and-margin relationship.
Use the actual payload
Our QR print size checker encodes your content with high error correction, reports the resulting module count and includes the clear margin in the finished width. It flags modules smaller than 0.4 mm or fewer than four printer dots as a conservative starting check. These are product guidance thresholds, not certification requirements.
More error correction can increase density. It also does not make a large logo harmless: logos cover data, while quiet zones and locator patterns need to remain clear. Test the final branded artwork, not just the checker’s plain square version.
Pixels and millimeters answer different questions
Millimeters describe the printed footprint. Pixels describe a raster image. The same pixel file can print at several physical sizes depending on the application. At 300 DPI, a 25 mm image needs roughly 296 pixels across; an export with whole pixels per module can be a little larger. SVG preserves the vector geometry and can include physical dimensions, but the print dialog can still scale it.
Compare three samples
Download the A4 comparison sheet. It contains 80%, 100% and 120% versions of the chosen size and a 50 mm ruler. Print at actual size and measure that ruler first. Then test on the intended material, at the expected distance, in the lighting where the code will be used.
A matte paper test is not enough for a reflective bottle or a curved package. Confirm the destination too, and keep an approved sample with the print job so a later reprint has a physical reference.