
Custom-domain QR codes: self-service DNS and HTTPS setup
Connect a scan subdomain, copy TXT and CNAME records, verify HTTPS and choose it for new QR codes without changing old print.
Dernière publication
Dans cet article
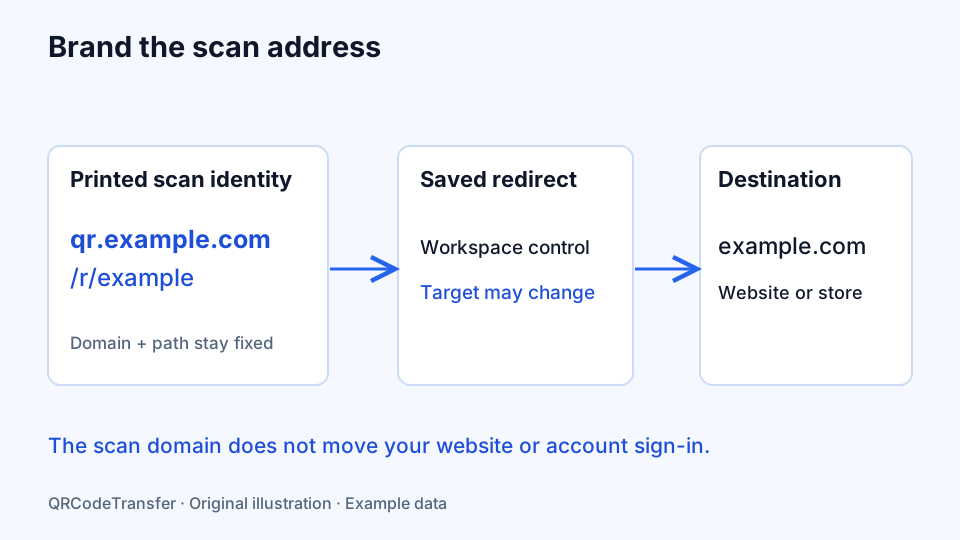
A custom domain can make a printed scan address recognizable without moving your website. For example, a business can use a subdomain such as qr.example.com for managed QR redirects and continue publishing its website, store and account sign-in on their existing domains.
The distinction matters before printing. The domain and path inside a saved QR identity remain permanent. You can maintain its destination, but switching the workspace’s default domain later does not rewrite a code already placed on packaging. This guide follows the self-service domain workflow in QRCodeTransfer.
Choose a subdomain you can manage
Use a hostname whose DNS records you can edit, preferably an unused subdomain. Enter the hostname alone: no https://, path, query or trailing slash. Keep the main website on its current domain. If another service already uses the selected hostname, choose a different one before creating conflicting records.
DNS access and workspace access are separate. A workspace owner or administrator adds the hostname, but the person who manages the domain must also be able to publish the supplied records. Check the custom-domain allowance in the workspace’s current plan before beginning.
Add the hostname in your workspace
- Open User center → Custom domains in the correct workspace.
- Add the chosen subdomain and review the generated instructions.
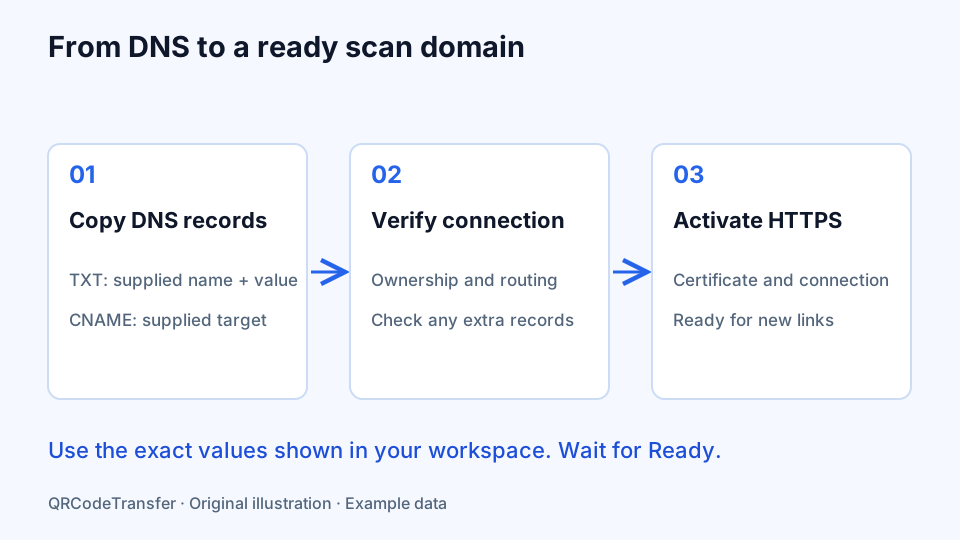
- Copy the exact TXT name and value, plus the CNAME name and target. Do not use a reference or status identifier as a DNS value.
- Open the DNS settings at the provider responsible for that domain and enter the records there.
For a hostname such as qr.example.com, many providers expect the CNAME host field to be qr within the example.com zone, while others accept the full name. Follow the provider’s field convention and the records shown by the workspace. The TXT verification name can differ from the CNAME hostname, so copy both names independently.
Understand what each check does
| Step | Purpose | What to inspect |
|---|---|---|
| TXT | Verify control of the hostname | Exact supplied record name and value |
| CNAME | Route the subdomain to the scan service | Exact supplied target and no conflicting address records |
| HTTPS | Activate the certificate for this hostname | Any additional certificate records shown in the instructions |
| Connection | Confirm the hostname can serve the scan route | The workspace status and an actual HTTPS test |
Use DNS-only mode for the instructed CNAME rather than adding an extra proxy. Update DNS, click Verify connection and allow caches to refresh. HTTPS activates after the required checks pass. If additional certificate validation records are shown, publish those too. Repeatedly pressing Verify cannot repair an incorrect record or activate a provider configuration that is absent.
Choose it when creating a new code
Once the domain is ready, you can set it as the default for new links. In supported creation screens, the scan-domain selector also lets you choose the platform domain or an active workspace domain for that particular item. The default is a convenient starting selection, not a forced migration of existing assets.
Select the domain before saving the new managed code or link. Static QR types that directly encode text, Wi-Fi data or a payment request do not need a managed scan domain. A destination website still keeps its own URL; the custom domain brands the redirect address that gets the visitor there.
Test before distributing the artwork
- Create a small, clearly named test dynamic code using the ready domain.
- Open its complete HTTPS scan URL without your editing session.
- Confirm the final destination and any destination-side login requirements.
- Download the image and scan it on the devices your visitors use.
- Print a sample at the intended size and check the actual result.
Save the approved scan URL alongside the artwork and record which workspace owns it. A code that looks visually similar to another one may point to a different hostname or destination. Checking the decoded address is more reliable than recognizing a pattern by eye.
Troubleshoot the setup in order
If ownership verification fails, inspect the TXT name and value. If routing is wrong, inspect the CNAME target and remove conflicting A or AAAA records on the selected unused subdomain. If HTTPS is pending, review the certificate instructions and allow DNS changes to propagate. Use the status and supplied diagnostic message to decide what to correct.
Do not delete unrelated DNS records from your main website. A correct subdomain setup should not require replacing the domain’s main web hosting. If the workspace reports a service configuration problem, record the hostname and message for support rather than sending passwords, API tokens or account secrets.
Keep the printed address dependable
Maintain the domain registration and DNS for as long as printed items need to work. A hostname still referenced by saved links cannot simply be removed from the workspace. Changing your default to another ready domain affects future creations; existing links retain their original domain and path.
When a campaign changes, edit the managed destination instead of moving the printed identity. Confirm the workspace’s plan and domain eligibility before a renewal or downgrade. This preserves the relationship between an old label and the redirect you control, rather than assuming a new domain can take over the old address.
Use the domain selection guide while setting up, compare current domain allowances on Pricing, and read the printed-destination guide when updating an existing campaign.
Prêt à créer votre code ?
Essayez le générateur ou inscrivez-vous pour gérer des codes dynamiques.
Créer un QR code