
Video QR codes: playback clips and a custom viewing page
Upload a video, set a playback interval, choose its aspect ratio and publish a viewing page. Practical steps, limits and print checks.
Latest published update
In this article
A printed instruction label is easier to use when a scan opens the relevant part of a video, rather than a long explanation about where to find it. A video QR code can connect packaging, equipment or a handout to a maintained viewing page. The printed code contains that page’s managed address; it does not store the movie inside the image.
With QRCodeTransfer video pages, you can upload a video, set its playback window, choose the display ratio and publish a page with a title, description, poster, logo and links. This guide explains the workflow and the distinction between playback settings and editing the original file.
Prepare a video the visitor can play
Upload MP4 or WebM, up to the current 20 MB file limit. H.264/AAC MP4 is recommended for broad compatibility. Test the actual file on the phones and browsers your audience uses: a filename ending in MP4 alone does not tell you whether its codecs are supported by every device.
Keep the content focused on the action the label describes. For a setup label, show the setup step. For a care tag, explain the particular task. A readable caption beside the printed code helps people decide what they will open and remains useful when their device is offline.
Create the viewing page
- Sign in and open the video-page creation workflow in the intended workspace.
- Select the platform scan domain or a ready workspace domain before saving the new managed identity.
- Upload your video and check that playback succeeds in the preview.
- Add a useful title, description and, if needed, a poster, logo and related links.
- Set the playback interval and display settings described below.
- Save the draft, inspect its preview and publish when ready.
An uploaded video takes priority over the page’s other video link. Direct MP4/WebM URLs can play in the page; other external links open on their own website. Uploading gives you the file-selection workflow here, while using an external destination means maintaining availability and permissions at that destination too.
Choose a playback interval, not a destructive cut
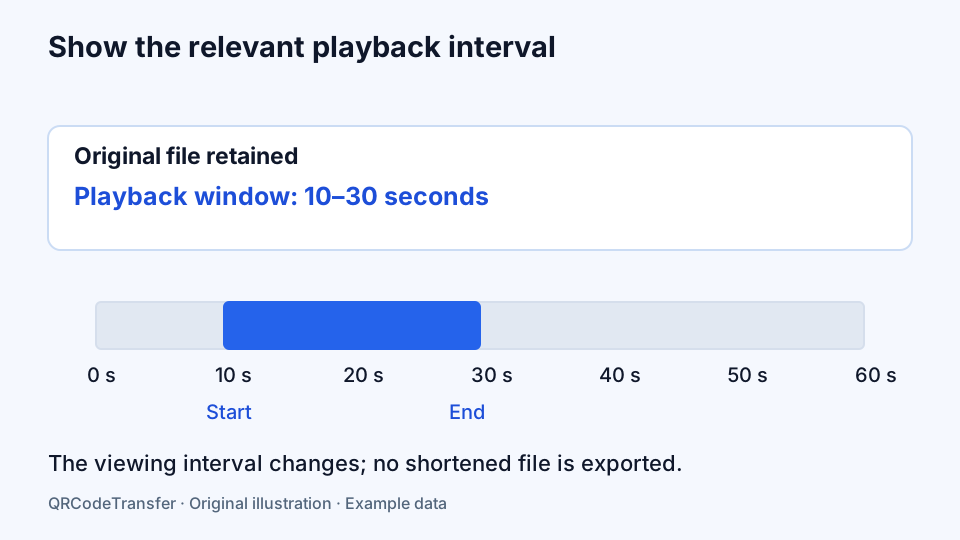
Set the start and end in seconds, or use the preview’s current position. For example, a 60-second instruction can present seconds 10–30 as the relevant step. The player uses that interval, and the replay action returns to the selected start.
This changes the viewing window and keeps the original file. It does not render or export a shortened movie. If you offer an original-file download, the downloaded file remains the original, rather than the selected clip. Use a video editor before uploading when you require a permanently cut source file.
Check the beginning, end and replay action in the preview. Listen to the selected section as well as watching it: a visually tidy cut may begin halfway through a sentence. Later changes to this interval do not require uploading the same video again, but must be published before visitors see them.
Fit the frame to the material
| Setting | Practical use | What to check |
|---|---|---|
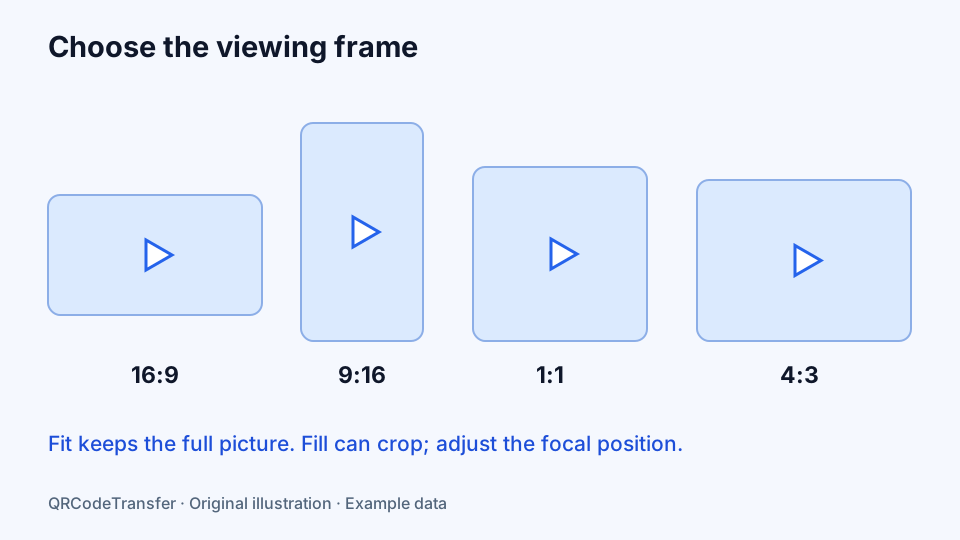
| Original ratio | Keep the uploaded material’s proportions | Portrait and landscape appearance on the viewing page |
| 16:9 or 4:3 | Landscape demonstrations and presentations | Small text and details on a phone |
| 9:16 | Portrait instructions or a phone-shaped composition | Whether important content stays visible |
| 1:1 | A square presentation | The complete action within a compact frame |
| Fit | Preserve the complete picture | Unused space around the source |
| Fill and focus | Fill the selected frame | Horizontal and vertical focus; avoid hiding essential details |
These controls alter the viewing layout, not the source resolution. Filling a portrait frame with a landscape video can crop the visible edges. Move the focus deliberately and test several moments in the clip; a position that works for its first frame may conceal a hand or label later.
Design the page around the next action
Use a title that tells the visitor what to do and a short description that gives context. A poster can make an idle player understandable. Choose a light, dark or colored theme, accent color and page width. Add relevant links, such as the product instructions, a PDF or a support destination, rather than filling the page with unrelated options.
Offer fullscreen when it helps someone inspect a detail, looping when a repeated demonstration is useful, and an original-file download when visitors need a copy. Fullscreen starts from a visitor action. Autoplay requires mute and can still be blocked by a browser, so keep a clear manual play path.
Hiding a download button is a presentation setting, not protection for the original video. Use a public viewing page only for material intended for visitors with its link. Private record attachments have a different permission model and should not be treated as public video-page media.
Publish, scan and test the printed version
Saving a new draft does not replace the currently published view. Publish the revision, open the public URL without relying on your editing session, then scan the actual QR image on a phone. Check the title, interval, aspect ratio, fullscreen and related links.
Choose a print template that fits the material. A manual-and-video label can provide separate codes for the written document and demonstration. Give them separate captions and confirm both component bindings in a batch. Print at the intended size and test each complete destination, rather than stopping when the scanner recognizes a link.
Maintain the content and its allowance
Edit the same video page and publish again to retain the saved scan address. Choose a replacement file only after checking it. An already downloaded copy remains unchanged; maintaining the page changes future visits.
Default total video-page allowances are Free 1, Pro 5, Business 30 and Business Plus 100. This is separate from ordinary page capacity. Draft and paused videos count, while deleting a video page frees its slot. Playback and page-editing tools are included on every plan. Check the effective workspace limits on Pricing and billing.
Read the statistics correctly
Recorded scans of the managed QR address can appear in workspace analytics. They do not measure video views, viewing duration or completion. A visitor may scan and leave without playing, or replay the same clip without scanning again. Use those counts to understand access to the QR destination, rather than claiming a number of completed lessons or demonstrations.
Follow the video setup guide, review private file previews, and use the print size checker for the final artwork.